Entering the magical world of birds can be done in various ways and with different types of aircraft. Paragliding is one of the most popular and accessible ways to experience these sensations. It’s one of the closest things humans can do to flying like birds because you feel the wind on your face and body, use the same rising air currents (thermals and dynamic) that birds use, and take off from a mountain. One of the advantages of paragliding compared to other aircraft is that you can easily transport your glider in a backpack, take off effortlessly from the mountain, it doesn’t have a motor, and you can land in small spaces.
There are two options for experiencing this freedom, which we will explain below:
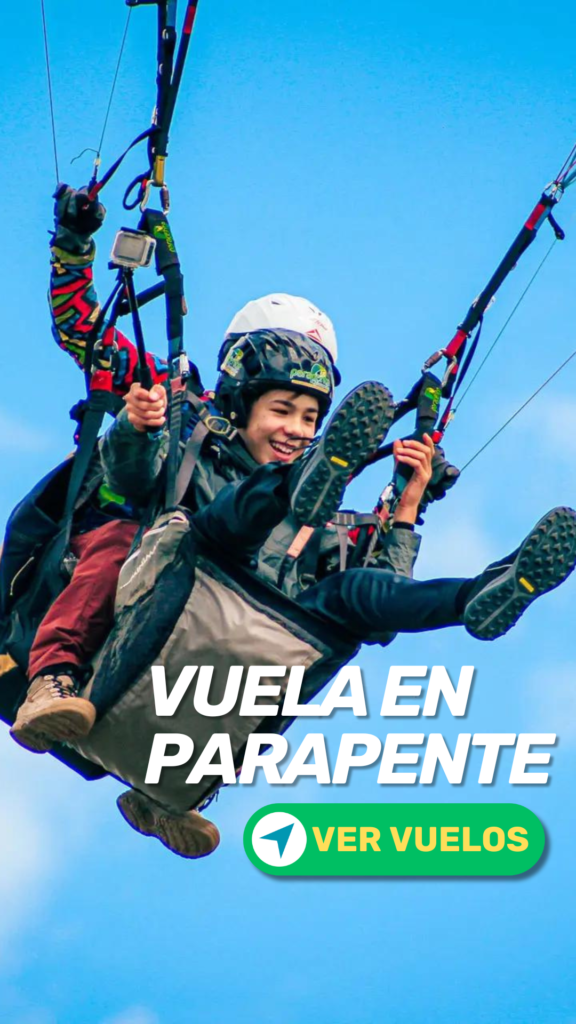
Tandem or two-seater flight
No prior experience is required. You will receive a briefing of about 10 minutes before the activity and will be ready to fly with an experienced and qualified pilot. The aircraft used is a tandem paraglider, which accommodates two people: a pilot and a passenger.
- Note: Tandem paragliders are larger than those used for solo flights. These gliders are certified for this activity.
Flying on your own
This requires prior experience. You must have your own flying equipment or rent one from a school that matches your weight range. There is also the option of taking a paragliding course to advance with the guidance of a qualified instructor.
Next, we will explain what you need to consider for paragliding for either of the two options mentioned above.
Tandem Paragliding Flight
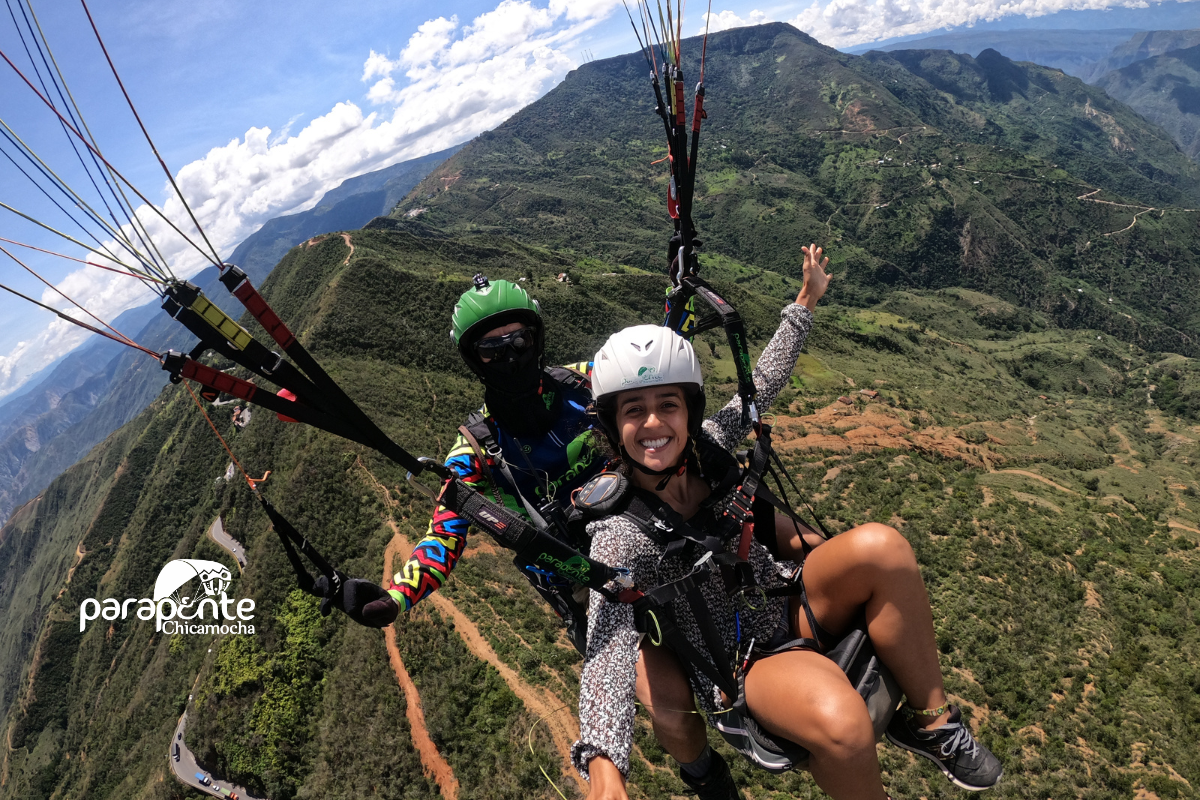
Tandem flying, also known as a two-seater flight, is the best option for someone who has never had any experience with paragliding. Here, we’ll tell you everything you need to know to find a safe place to enjoy this activity, along with tips for before, during, and after the flight. With this, we guarantee that you’ll be in the best hands and have an unforgettable experience that you’ll want to repeat.
Choose a qualifies company
Taking a tandem flight, also known as a two-seater flight, is the best option for someone who has never flown with a paraglider before. Here’s everything you need to know to find a safe place to do this activity, along with tips for before, during, and after the flight. With this information, we guarantee you’ll be in good hands and have an unforgettable experience that you’ll want to repeat.
There are several ways to ensure that the service you’re hiring is of high quality and that you’ll be in good hands. If you’re booking through a travel agency or accommodation, make sure to ask for the name of the operating company providing the flight service. Once you have the company’s information, look it up on Google, check their website, social media profiles, and reviews on Google Maps and TripAdvisor. Assess both the quantity and quality of the reviews to get a balanced view. Inquire about the experience of their pilots and ensure they hold a tandem pilot license from the Colombian Air Sports Federation (FEDEAEREOS). Ask if they have a physical office and visit it to ensure there is a serious organization behind the service. Verify that their RNT (National Tourism Registry) is active. If you have doubts or don’t receive reassuring information, make sure to choose the best option. Compare, and don’t be swayed by price; your safety and that of your loved ones are worth more than a “discount.”
Follow us on our social media
BEFORE THE FLIGHT
The following recommendations will make your paragliding experience a great memory:
- It’s best to spend the night before calmly, without alcohol or partying.
- On the day of the flight, eat a light meal.
- Wear comfortable clothing.
- Wear closed shoes, preferably athletic or hiking shoes.
- Since paragliding is usually done in sunny conditions, it’s a good idea to bring sunscreen and sunglasses.
- In the mountains, there are almost always mosquitoes, so insect repellent is a good companion
Upon arrival at the take-off site
Upon arriving at the take-off site, the activity begins with a mandatory registration process, which may be a bit tedious but is required by Colombian regulations. Next, you’ll receive a safety briefing. After that, you’ll need to be patient while waiting for your turn. Paragliding is dependent on weather conditions, so the organization will assign turn slots based on factors such as the passenger’s weight, the pilot’s weight, the size of the paraglider to be used, and the current climatic conditions.
To start the flight
Follow the pilot’s instructions (see video); we could say that the takeoff is where the passenger’s assistance is needed. Therefore, at that point in the activity, the passenger should
- DO NOT sit down
- DO NOT jump
- DO NOT stop unless instructed by the pilot
Just WALK or RUN forward, and in a few seconds, you’ll be flying.
During the flight
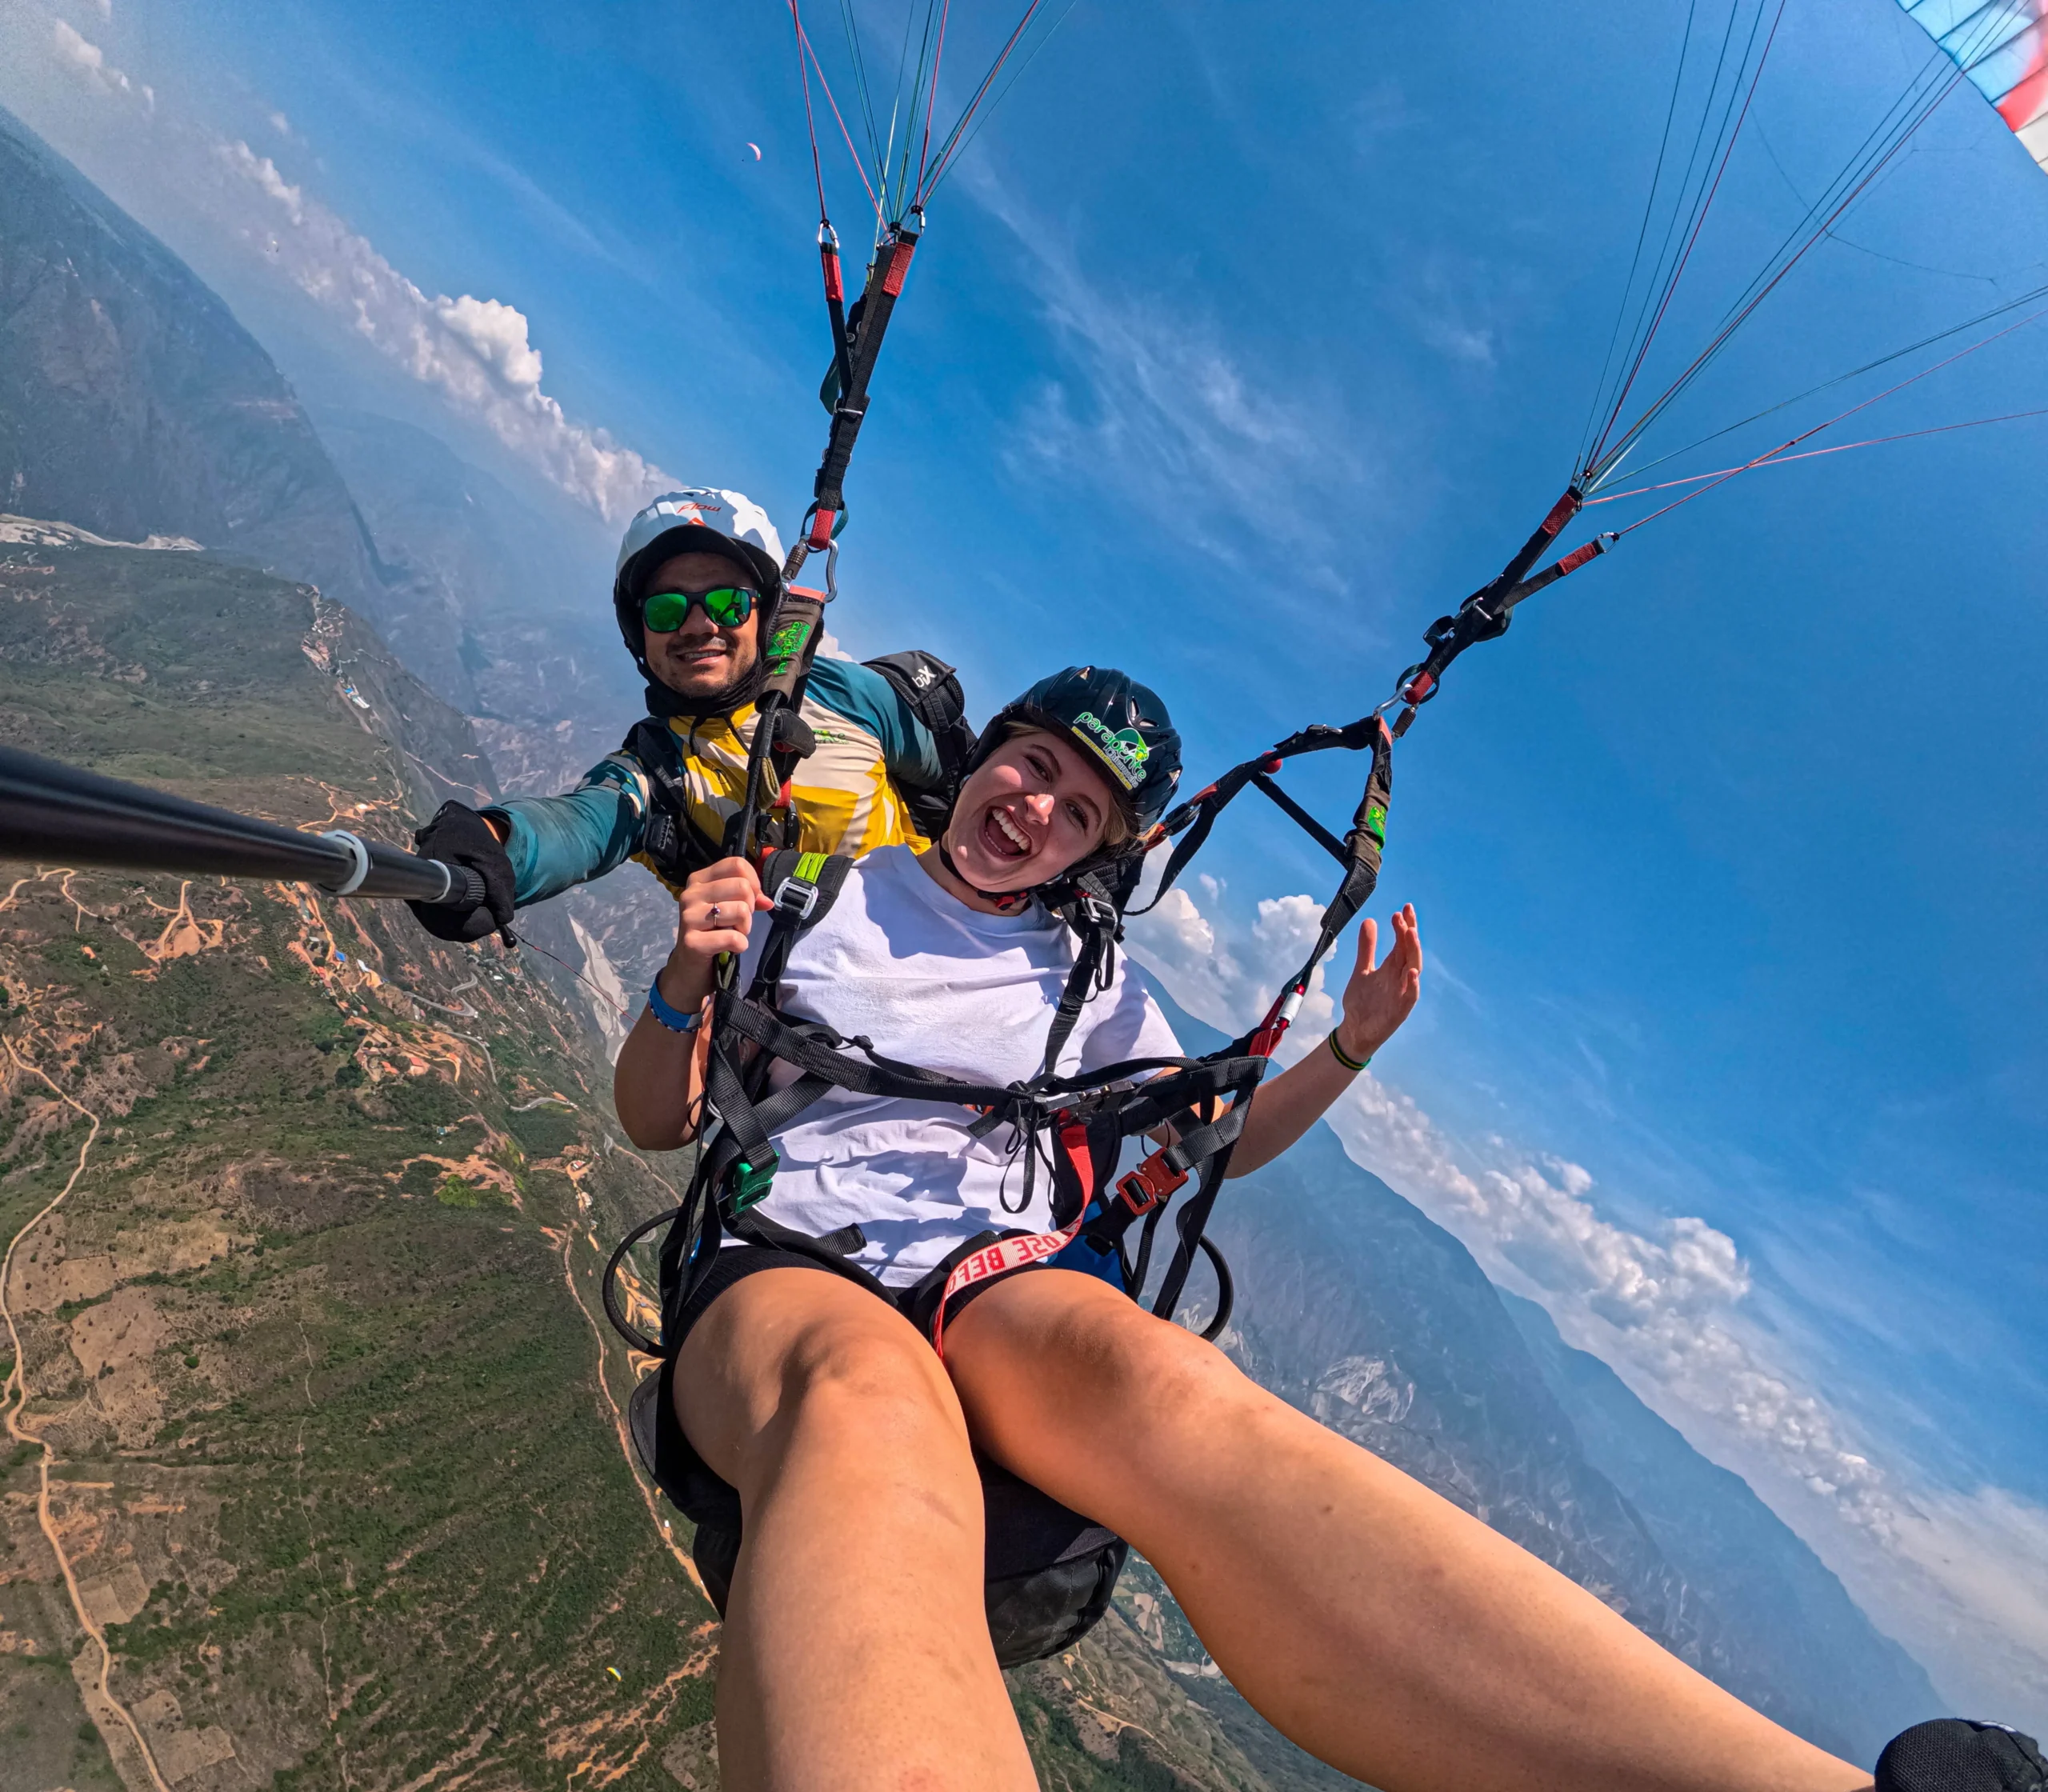
Stay calm and maintain communication with the pilot. If you feel unwell or dizzy, request to land early. While it’s tempting to focus on taking photos and videos, it’s also important to enjoy the experience. It’s a good idea to take a few pictures at different moments and then take breaks. The pilot will usually assist you, so relax, enjoy the scenery, look far ahead, and breathe deeply and slowly. The time will fly by!
For landing
Follow the pilot’s instructions. Sometimes you may need to stand up and walk or run, while at other times, you may only need to lift your feet forward.
Photo and Video Service
We understand that memories are very important. It’s essential to know that taking photos and videos should only be done occasionally, not continuously. It’s similar to traveling by car—if you’re on your phone the entire time, you might feel nauseous. It’s better to take breaks and ask the pilot for assistance at certain moments.
It’s advisable to take shots both vertically and horizontally, extend your arm and selfie stick, and try to avoid showing the stick in the frame. You can switch hands, adjust the camera to different angles and positions, and rotate it to capture the scenery. Ensure the selfie stick is as short as possible during takeoff and landing.
After the flight
If you experienced dizziness, drink liquids slowly and rest for a while until you feel better. Afterward, try to eat something light. Don’t feel bad—it’s a natural reaction that can happen to anyone, similar to what might occur in a boat, car, plane, or carousel.
If you’ve managed to fulfill your desire to fly and are ready for an incredible experience, don’t hesitate to check out all our paragliding plans Over the Chicamocha Canyon.

Paragliding on Your Own
To experience flying on your own, you must enroll in a paragliding course. Initially, you will learn to control the wing (paraglider) on the ground, practicing walking or running with the wing overhead, and then move on to small “bunny hop” flights. As you gain experience, the intensity of your flights will increase, with higher flights accompanied by radio communication with the instructor. As you become more skilled, assistance will decrease, and you will begin to gain autonomy.
Paragliding is considered one of the easiest aircraft to fly technically, but to perform this activity safely, it’s important to have both technical skills and theoretical knowledge in meteorology, aerodynamics, and flight mechanics. More knowledge leads to better performance, longer and higher flights, and greater safety.
Here are some tips to consider during your learning process and development:
Find a Paragliding school
It is important to know that to learn how to paraglide, you need to attend a school; this cannot be learned through YouTube or by reading a book (although reading books and watching videos are part of the learning process). You need the guidance of a certified instructor and monitor. You should research paragliding locations, schools, and inquire about the most suitable learning plan for you, considering factors such as time, proximity, weather conditions, instructor experience, equipment to be used, and the curriculum

Getting to know your equipment
You will learn all of this during the teaching process; however, here are a few tips:
Approval and Size
Paragliders must pass an approval process to determine their level or category. The common norm is the CEN (EN) standard, categorized as A, B, C, D, and CCC, where A is for beginners, B for intermediates, C for advanced, and D and CCC for very advanced and competition. However, there are also other types of approvals, such as freestyle and acro paragliders, tandem paragliders, and paramotors. Remember that flying a more advanced paraglider doesn’t make you a better pilot. It might help with photos or conversations with friends, but in the event of a collapse or facing adverse conditions, your true skills will show. It’s important to understand that depending on your body weight, you choose the size of the paraglider wing. You must look at the weight range provided by the manufacturer, which should match your weight plus the total weight of the equipment. Each category offers different weight range options. Bonus: If you want to make longer and better flights, you don’t need a more advanced wing; you need to read and practice more! Before upgrading the level of your wing, ensure you perfectly control your current one and can push it to its performance limits!
Harness or Seat
Just like choosing the wing, the paraglider harness or seat is also designed in different categories. There are ultra-light harnesses, hike-and-fly harnesses, beginner, intermediate, cross-country, acro, tandem pilot, passenger, etc. Each category also comes in different sizes, so when choosing, be very aware of your level and height. If you have any doubts, consult an expert.
The Reserve Parachute
Reserve is another element with different categories; they come in round, square, triangular, dirigible, and Rogallo shapes, each with sub-categories like light, ultra light, tandem, etc. Each category has sizes with weight ranges. To choose the right one, you need to consider your body weight plus the total weight of the equipment. You should also know that depending on the category you choose, the opening time, descent rate, pendulum effect, and control you have after opening will vary.
- MYTH: It is said that to choose your parachute, if you want a faster opening, you can use a smaller parachute or be at the minimum range. This is false! What you can actually cause is your parachute breaking upon opening, and if it doesn’t break, your descent rate will be higher, possibly causing you to reach the ground too quickly.
- It is said that using a special folding method makes the parachute open faster. Apparently true, but NOT recommended! Using a different folding method than what the manufacturer specifies could result in the parachute breaking upon opening.
- Most Important: Choose a parachute within the appropriate weight range. Ensure the parachute is within its lifespan (usually 10 years, with some manufacturers extending up to 12 years). Make sure it has had proper maintenance (aired and repacked at least once a year). During maintenance, ensure the repacking is done exactly as specified by the manufacturer. Connect the parachute properly to the harness (handle connected to the container, parachute connected via a maillon to the straps attached to the harness, and use elastic bands to ensure the maillon doesn’t move or create gaps between the straps). Make sure the straps are connected to the harness, typically at the shoulders. Read the harness manual to correctly mount the parachute in the container. Some setups have an external ventral container; in this case, ensure the straps are attached to the main carabiners and that the container doesn’t twist when you pull the handle upwards. After mounting the reserve parachute, do a test in a simulator to ensure you can locate and deploy it. It’s useless to have the best parachute if you can’t find it when you need it, can’t deploy it, or if it’s not properly connected to the harness.
Bonus: Depending on the problem you encounter in flight, you need to choose how to throw the parachute once you have it in your hands, holding the handle:
- If you are falling vertically: Throw it strongly to the side; do NOT let it fall vertically.
- If you are spinning in a spiral: Simply taking it out and letting it fall will work, though throwing it to the side is also an option.
- If you are in autorotation or SAT: Throw it like you are throwing a grenade, aiming at the trailing edge of the wing (some recommend for autorotation to throw it at your feet).
These terms might not sound familiar, which is why school and an instructor are important to help and explain each situation. Even more recommended is taking an SIV course (Simulated Incidents in Flight). In all cases of using the reserve, it is important that once the parachute opens, you completely disable the paraglider. Some systems allow you to release it and rely solely on the emergency parachute.
Here is a video (see video) by Jocky Sanderson and an article (re by Jordi Marquillas that might help.
Helmet
This is another element that comes in different models, colors, and sizes. For choosing one, we recommend picking the one you like the most (haha), and of course, one that fits well.
Communication Radio
It is important to have communication with people on the ground or with other pilots. Check the communication before starting the flight and report upon landing.
Flight Instruments
There is a variety of electronic devices that assist during flight. The most common are variometers alone, alti-vario, and alti-vario + GPS. When choosing, consider what type of flight you need it for. Some areas require precise knowledge of allowed or prohibited airspaces and altitude limits. Nowadays, there are flight computers that allow you to navigate on a map, check what’s ahead, record your track, and send live tracking signals. Some apps also provide similar functions. Make sure to have what you need to avoid problems from being in prohibited areas. It’s important to inquire with local pilots and input the necessary information into your instruments to avoid exceeding limits. A compass remains an irreplaceable instrument; even with electronic devices, don’t forget to carry one.
Before the flight
The first step is to conduct a meteorological analysis of the potential conditions you will encounter. This helps save time by avoiding trips to the mountain only to find that you can’t fly or that the conditions are not suitable for the type of flight you planned. There are various websites for checking the weather, and their effectiveness depends on your location—some work better than others. There are both free and paid options. You should try different ones to find which works best for your area. Once you know which one is most reliable, you should check the wind direction and speed at different times and altitudes, cloud cover, cloud heights, probability of rain and storms, and temperature changes with altitude. Some websites provide an analysis of the state curve and show how high the thermals will rise, whether they will condense or not, whether the day will be stable or unstable, if there will be a thermal inversion, and whether it might be beneficial to launch from a higher altitude, etc.
To gain a better understanding of the above, it’s important to learn about meteorology. Your school will teach you about these topics, and there are books and videos that help explain and guide you in using weather prediction websites. Additionally, local weather data is crucial, so speaking with local pilots and inquiring about daily conditions is important.
- Bonus: The most commonly used websites are: Meteoblue, Windy, NOAA Ready, Meteo Parapente, and XCskies.
Inspection of the landing site
If we are unfamiliar with the area, it is advisable to visit the landing zone beforehand. Analyze the obstacles (such as power lines, trees, ground holes, rocks, etc.). Typically, there are wind socks available; if not, place something that helps you see where the wind is coming from. Visualize how you will make your approach. This will give you greater confidence in your flight.
Takeoff site inspection
Just as with the landing area, it’s important to analyze the environment when you arrive at a takeoff site. Examine the obstacles (e.g., power lines, rocks, wire fences, trees, etc.), determine the direction of the wind or breeze, and check the horizon for any incoming rain or storms. Assess the terrain shape and choose the best spot to inflate the wing easily, ideally away from obstacles and with ample space for your takeoff run. Also, identify your “point of no return.”
- The “point of no return” is an imaginary line or a mark you can make with tape or string. At this point, the pilot must be sure everything is in order before starting the acceleration for takeoff. If, upon reaching this point, the pilot is not sure everything is correct or is certain something is wrong, they should stop and start again.
Organizing the equipment
The equipment should be checked before starting the inflation. The lines and brakes must be free of tangles, and ensure that no lines are on top of the fabric. They should run straight from the attachment to the risers. With a constant breeze, a pre-inflation can be done. Before putting on the harness, check that the parachute handle and pins are in place. The harness should be put on following the safety procedure learned in the course (always legs first, then the chest strap). Adjust the helmet and make sure the chin strap is securely fastened. The radio should be adjusted to the harness. When connecting the harness to the wing, ensure there are no twists. Now you’re ready for takeoff, but before inflating, it’s good to analyze the wind intensity, direction, cycles, and wait for the best moment.
Vital points: Just before inflating, I should check:
- Leg and chest strap clips
- Carabiners
- Brakes free
- Airspace
- Radio
Once I am sure everything is in order, I choose my inflation technique (front or cross) depending on the wind cycles. I ensure that my airspace is clear (no one flying nearby or someone trying to land in the same place), and then proceed to inflate the wing. I perform a visual check of the wing to make sure everything is okay before reaching my point of no return. If everything is fine, I accelerate and take off. I move away from the mountain a bit, sit, and do a quick visual check from carabiner to carabiner (start at one carabiner, go up the strap, check the lines, check the wing, go down the other side, reach the strap, and end at the carabiner). Then, I enjoy the flight.
The following video (see video) will help you understand the procedure.
Know local regulations
It’s always best to get help from a local pilot. Ask about the day’s conditions, inform them of your experience level, inquire about airspace restrictions, and adhere to the local rules and regulations. Many places are prohibited for flying because visiting pilots did not follow the rules, or there are areas that ban visiting pilots to prevent such issues. It’s a bit sad, but it starts to make sense.
Flying with company
It’s best to fly with company. It makes it easier to find lift and you look out for each other. If something happens, there’s someone to report or help you. It’s not always possible, which is why communication via radio with the launch site or someone on the ground is crucial. There are also live tracking tools that allow you to send a link to someone so they can follow you online. These tools also enable you to send distress messages or report a safe landing.
Evolving gradually
Sometimes, after finishing a course, we feel like we can “conquer the world” and think that in just 10 days we’ve learned everything necessary. This is far from reality. We never stop learning, and our skills will always improve. Every flight teaches us something new. It’s very important to start evolving gradually. There’s no need for “racing” or letting our ego drive us to fly in conditions where only the most experienced pilots do, perform acrobatic maneuvers that only the most advanced pilots attempt, or land in smaller places where only the experts land.
To do these things, it’s better to practice in controlled environments. You don’t need to push to the limit in the smallest place. Instead, you can imagine that the larger area you’re using is smaller and try to practice precision landings at a specific point. To learn maneuvers, you might first take an SIV course and then progress in a suitable setting (like over water). Before upgrading to a higher-level wing, make sure you can handle your current wing to its limits and control it well in turbulent conditions. It’s not advisable to change all parts of your equipment at once. If you’re upgrading your wing, try to do so separately from your harness. If you’ve bought both, use the new wing with the old harness first, and after a few flights, switch to the new harness. This approach helps you adapt better to new equipment and ensures safety.
SIV Course
Simulation of In-Flight Incidents: Highly recommended for improving your skills and understanding the behavior of your wing. Additionally, you can practice using the reserve parachute. After completing an SIV course, you can say you’ve pushed your wing to its limits. It is advisable to do this after around 50 hours of flight (following the beginner course) and each time you change your wing. Ensure that you conduct it with qualified schools and, ideally, over water (such as a lake or the sea). These schools typically offer various levels of SIV and can guide you up to acrobatic flight. If you want to do things right, it is best to take this course before diving into thermal flying or cross-country flights.
Cross Country
Going further, being more efficient, making transitions, climbing to cloud base, crossing valleys, flying over mountains, and soaring for hours—this is the dream to achieve, to fly like the best! There are schools with the experience to help you in this regard. They have the right locations to take you further and safely. If you have the opportunity to do it, don’t hesitate!
Recommended Books
Depending on the language, there are specialized publishers and books on this topic. For now, I’ll leave you with the following:
| Book Title | Author | Publisher |
| Paragliding Initiation | Mario Arqué | Perfils |
| Visiting the Sky | Hubert Aupetit | Perfils |
| Thermal Flight | Burkhard Martens | Perfils |
| Fifty Ways to Fly Better | Bruce Goldsmith and Friends | |
| Advanced Paragliding | Visiting the Sky | Perfils |
Pages to follow
The following profiles will help you improve your knowledge of techniques and theories about paragliding
Follow the following accounts on Facebook
Follow the following accounts on Instagram
Follow the following accounts on YouTube
Follow the following channels on YouTube
and follow our manager and CEO, Sergio Gutierrez
We have created this article with the goal of providing you with the necessary tools to understand the world of paragliding and to give you a starting point based on your needs. Whether you just want to experience a tandem flight, need tips to find the best option, or if you’re interested in taking a course and want to know the procedure and how to find a school, we cover it all. For those already in a course or beginners, we focus on essential safety considerations.
If you’ve made it this far and have any questions or would like to add something, don’t hesitate to leave a comment. We will be responding soon.